Assembly Instructions: Experimentation Kit #2

Difficulty level: 1 (simple)
Experimentation Kit #2 allows you to compare different gauges of electromagnet wire and experiment how different
wire diameters affect the performance of the motors. These experiments can be
performed with all of the motors.
If you purchased this kit you
need to follow the regular instructions for the motor you are assembling.
However, instead of steps 10-12 for kits #1-6 or steps 11-13 for the kits #7-8,
please follow the instructions below. After that you may continue the regular
assembly instructions for the motor you are building.
![]() Printer-friendly assembly instructions in pdf format.
Printer-friendly assembly instructions in pdf format.
If you want to purchase this inexpensive and simple kit, click here.
Read all instructions carefully and check the Safety Rules before you start!
- All wire on each spool should be used to wrap around the area between the tape and the head of
the nail.
- Tape one end of wire leaving about 6" (15cm) open*. You may use the tape that is already on the nail.
- Wind all the wire in one rotational direction (either clockwise or counterclockwise) moving back and forth along the nail. Try to be as accurate as possible. Do not let the wire slide off the end of the electromagnet.
- Tape the second end of the wire using the same tape. Both open ends of wire should be about 6" (15cm) long*.
- Clean about
3/8" (10mm) of the wire tips with fine sandpaper (included) or a sharp
knife to remove the insulation.
* 10" (25cm) if your kit does not include a battery holder.
Repeat this step for 25 (thick) and 29 (thin) gauges of wire.
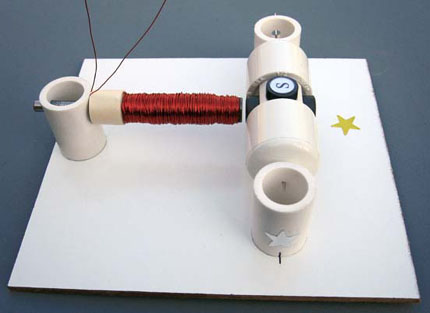
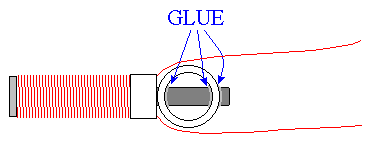
- Insert one of the
electromagnets into the stand with the green star. If it does not fit tightly,
you may secure it using one of the following methods. (Super Glue connection
between metal and plastic is not strong enough so you should be able to take
these parts apart by trying to rotate the electromagnet in the stand when you
need to replace it.)

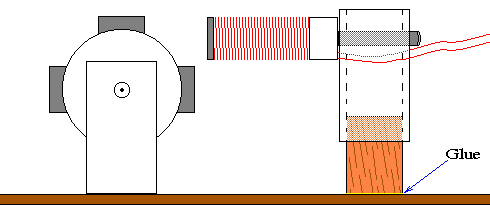
or

- Place the electromagnet on the board as shown below. Turn the rotor slowly to see if the magnets hit the electromagnet. If one or more do, move the electromagnet back until there is a 1/16" (1.5mm) gap between the electromagnet and the closest magnet on the rotor. Glue the inner stand to the board. It will allow easy replacement of the electromagnets in your experiments.

If the vibration generated by the motor moves the electromagnet, wrap the inner stand with a piece of scotch tape or thin piece of paper. If you are having difficulties inserting the inner stand you may need to sand it slightly with the sandpaper.